Company Configuration
Company Information:
- When logged in for the first time, user is redirected to the page below.
- It displays the Company Name which is given while registration
- Enter the Company Website address if exists
- Though Company Logo is optional, it is good to give since the logo is displayed on all reports generated by timeFrank.
- Enter all the required data, click Save
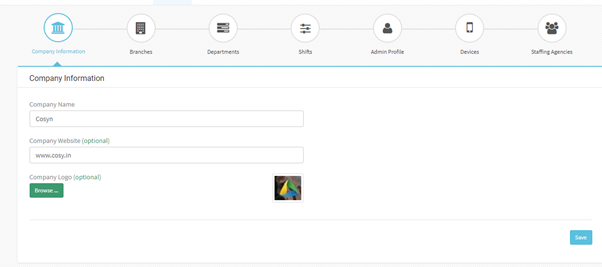
For any changes in details navigate to
- Company > Company Information
- Make the required changes and click ‘Save’
Branches
Creating a Branch
Navigate to Company > Head Office
You may or may not have multiple branches, but there should be a Head Office branch
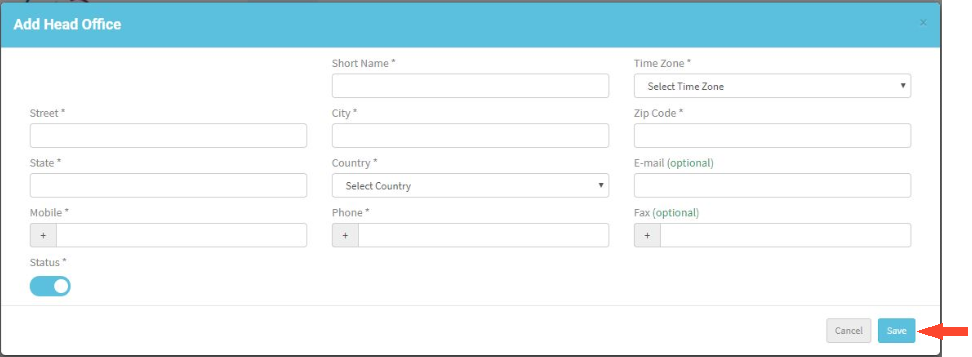
To create a Head Office branch click Add Head Office
- For Head Office branch the branch name can’t be changed.
- Short Name is to represent the branch on the Dashboard to display graphs and can’t exceed 4 characters, accepts all characters, numbers, special characters and space
- Enter Short Name, Time Zone, Street, City and other details
- Click ‘Save’
Now Head Office is added. Can add branches by clicking on ‘New Branch’
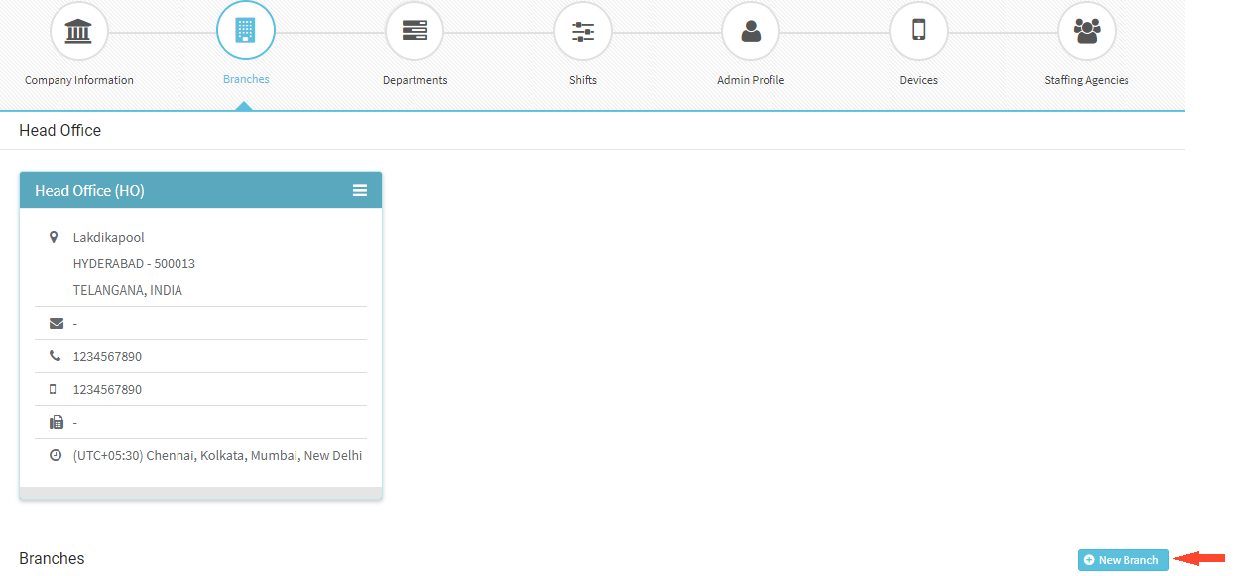
- Can give Branch name according to the requirement
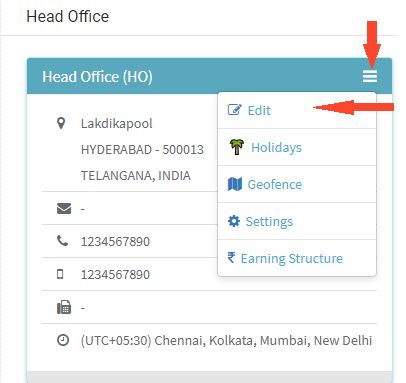
- To edit any branch details, click on 3 lines at top right corner of branch box and select Edit
- Modify the required details and click ‘Save’
Once a branch is created, if you don’t require the branch any more, you can change the status to Inactive, if no employees are not mapped to that branch.
You can assign an Administrator for each Branch separately.
Departments
- Navigate to Company > Departments
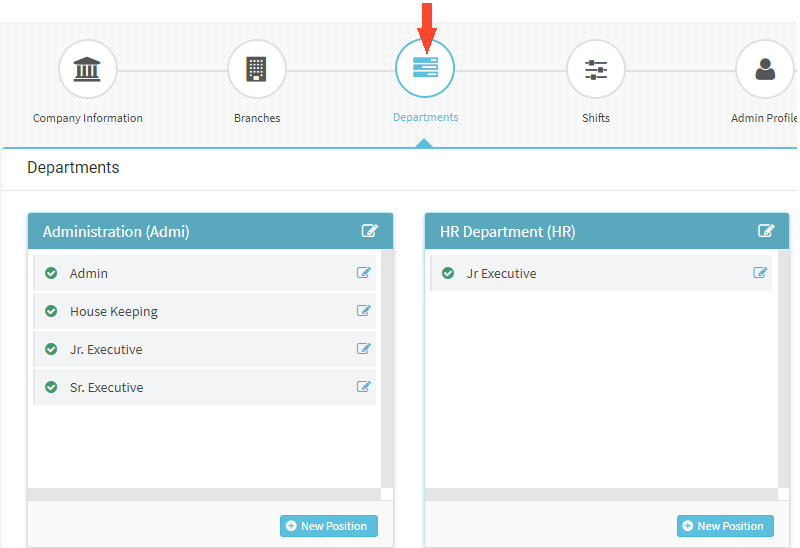
- Click on New Department
- Enter the required details like Department Name and Short Name
- Department Name can be minimum 1 character and maximum 40 characters
- Short Name can be minimum 1 character and maximum 4 characters
- Once Employee profiles are created and employees are assigned to Department, you can select Department Supervisor
- Can change the Status when department is not required, before changing the status make sure that there are no employees in that department
Positions
- Once departments are created, Positions can be created for Department
- Navigate to Company > Departments
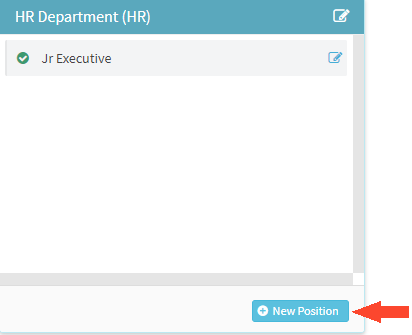
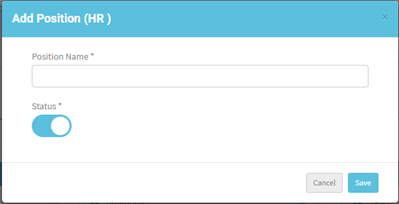
- Click on New Position
- Enter Position Name and click Save
- All the positions created for a Department will display in the department box
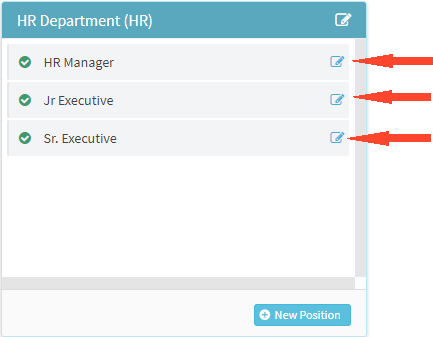
- Can change the Status when Position is not required, before changing the status make sure that there are no employees assigned for the Position
Company > Shifts
- We can create the shifts required for the organization
- There should be a minimum of one shift, which is called General shift
- Navigate to Company > Shifts
- Click on New Shift
- We define weekly offs according to shifts allocated to employees
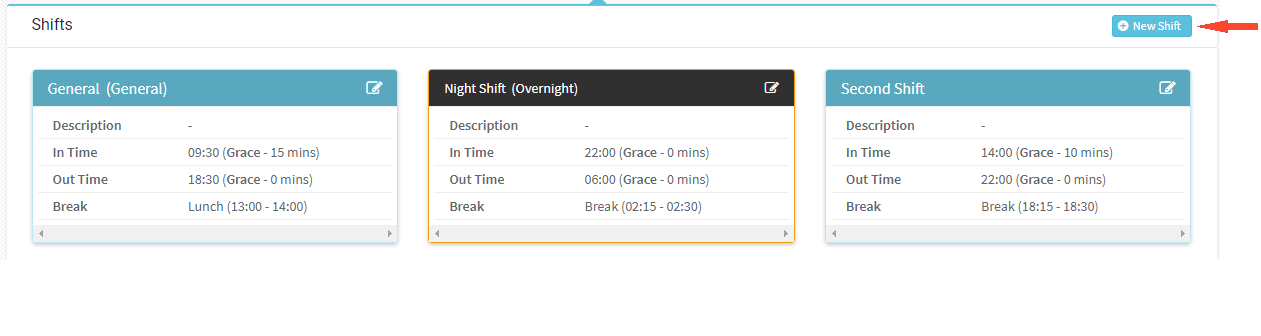
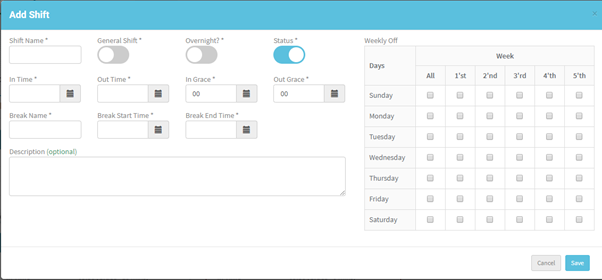
- Enter all the details like, Shift Name, In Time, Out Time and other details.
- Check the check boxes for the respective Week days which will be marked as Weekly off.
- Click Save
- If shift is marked as General Shift, then this shift will be assigned to Employee automatically when entering employee details
- In Time and Out Time are the timings for the shift start and end times
- In Grace is the minutes after which the employee will be marked as late employee
- Out Grace is the minutes the employee will not be marked as Absent if he leaves with in grace period
- If you need Overnight shift, ‘turn on’ the Over night shift, and the In Time should be greater then Out Time
- Can edit the details in future if required by clicking on Edit icon on right top corner of shift
- Can’t change the status of Shift if employee is assigned to the shift
Company > Admin Profile
- This is the profile for Admin
- Navigate to Company > Admin Profile
- First Name, Last Name, Email ID, Mobile values comes from the details which were given while registering the company
- Enter all other mandatory values. Date of Birth calculates the age of person and if it is less than 18 years it doesn’t allow to save the details
- Make the required changes and click Save.
Company > Devices
- Navigate to Company > Devices
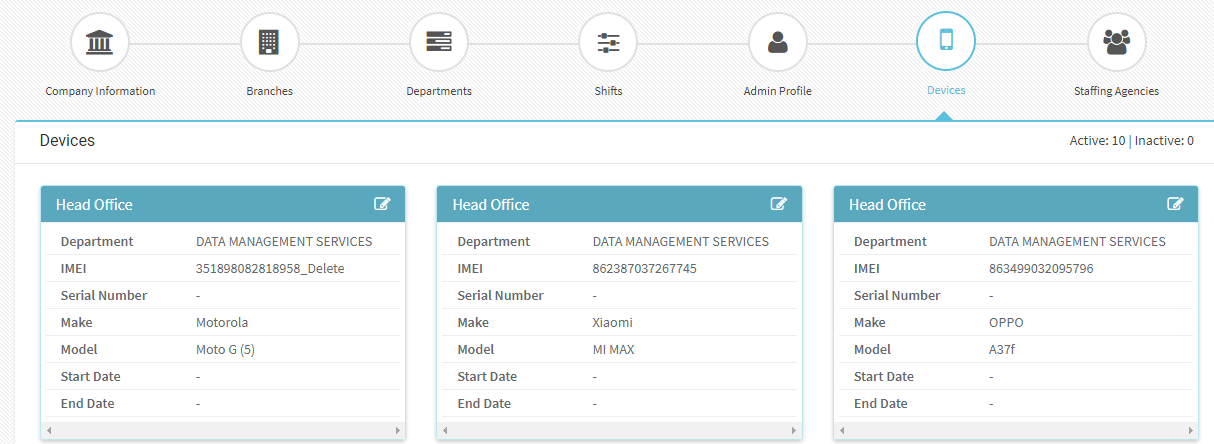
- Here we can find the list of all devices (Mobile/Tablet) connected to the organization, which are using Admin permissions
- Can change the status of any mobile device when not required
- Click edit icon at top right corner of mobile device and change the status
Company > Staffing Agencies
- Navigate to Company > Staffing Agencies
- This is where you find all the staffing agencies the organization is dealing with
- Click on ‘New Staffing Agency’
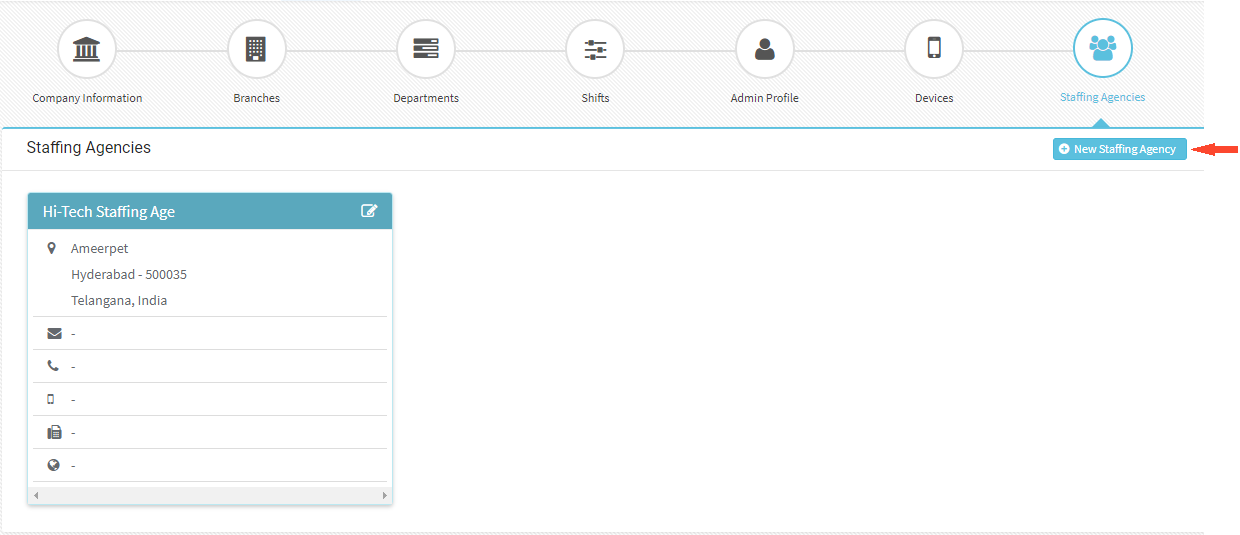
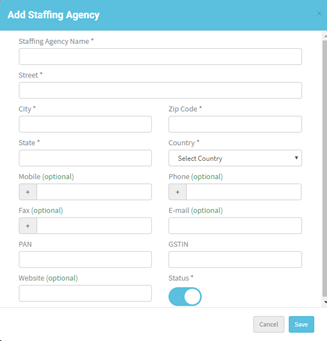
- Enter details like Staffing Agency Name, Street, City, Zip/PIN Code and other details
- Click Save to save the given details
- Can change the status if no employee is mapped to the Staffing Agency